


Hat Pattern
WHY AM I DRAWING THIS PATTERN?
- This way doesn’t need a printer, just paper, pencil, ruler and tape.
- The pattern is bigger than standard printer paper. Printing the pattern across multiple pages then taping it together often changes the size of the pattern – printers are “helpful” that way.
- This pattern size will fit a vast majority of human heads. If it’s too big, make this pattern then trim the hat (not the pattern) at the end for a custom fit to your head.
Supplies to make the pattern
- Four pieces of 8 1/2 x 11″ paper – any writing or printing paper will do
- A pencil
- A ruler
- Any kind of tape
How to draw the pattern
- Tape all 4 pieces together and flip the now bigger piece over so the tape is on the bottom
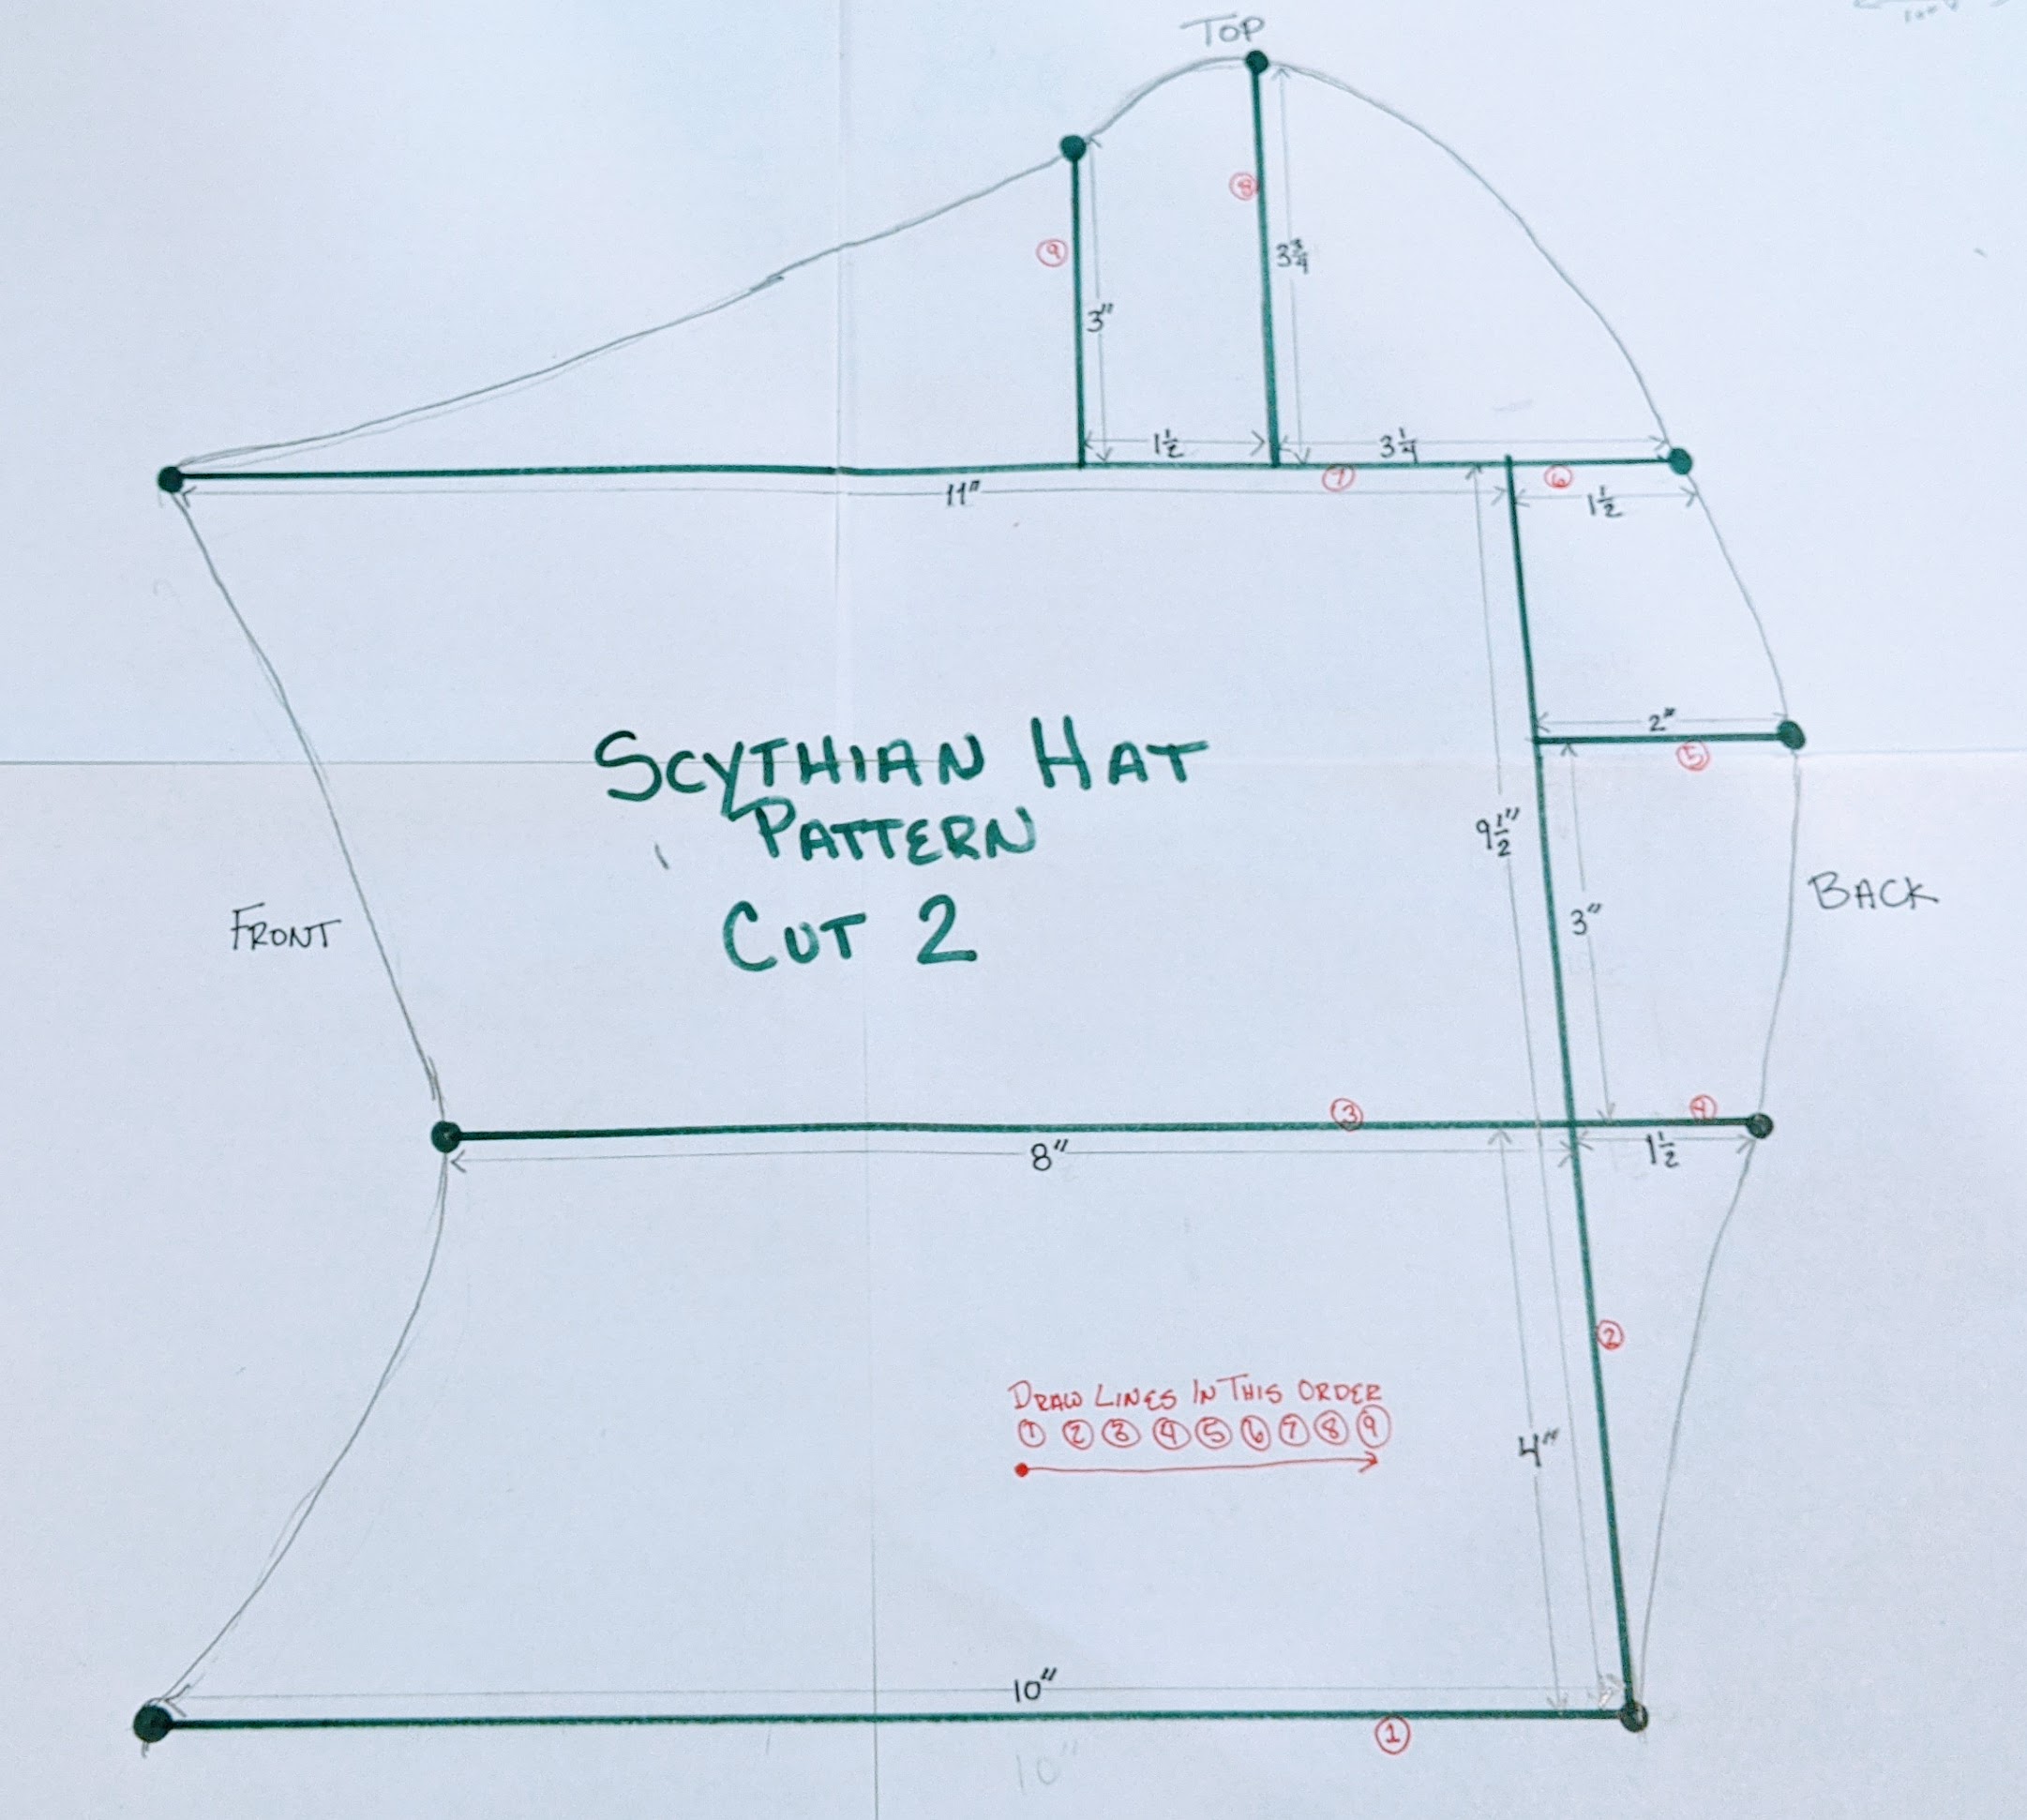
- Draw all the straight lines shown in the picture below in the order of the circled red numbers.
- Line 1: Start with the line marked with a red 1 at the bottom of the picture. The line should be 10 inches long.
- Line 2: Starting from the bottom right end of the first line, draw a 9 1/2 inch line
- Line 3: Draw a line line 4″ above line 1 that’s 8 inches on the left side of line 2 and 1 1/2 inches on the right side of line 2.
- Draw lines 4 through 9 as shown in the picture below.
- Draw a dot on the outside of each of the lines you drew.
- Play connect the dots with gentle curves between each dot until you have the outline of the hat. Don’t over think this too much, the dots are keeping the pattern size correct.
- Add another strip of tape to the paper joints on the top now that you’re done drawing on it.
- Cut out the pattern!
Sewing the Hat
- Trace the pattern twice onto the felt with a sharpie.
- Cut out both pieces
- Sew the two pieces together up the back with a baseball stitch
Don’t worry about spots of sharpie left on the felt, the marks will be hidden on the inside of the hat when it’s sewn together
